Bluetooth Usage
Seeed Studio XIAO ESP32C3 supports Bluetooth 5 (LE) connectivity. This wiki will introduce the basics of Bluetooth usage on this board.
Hardware set up
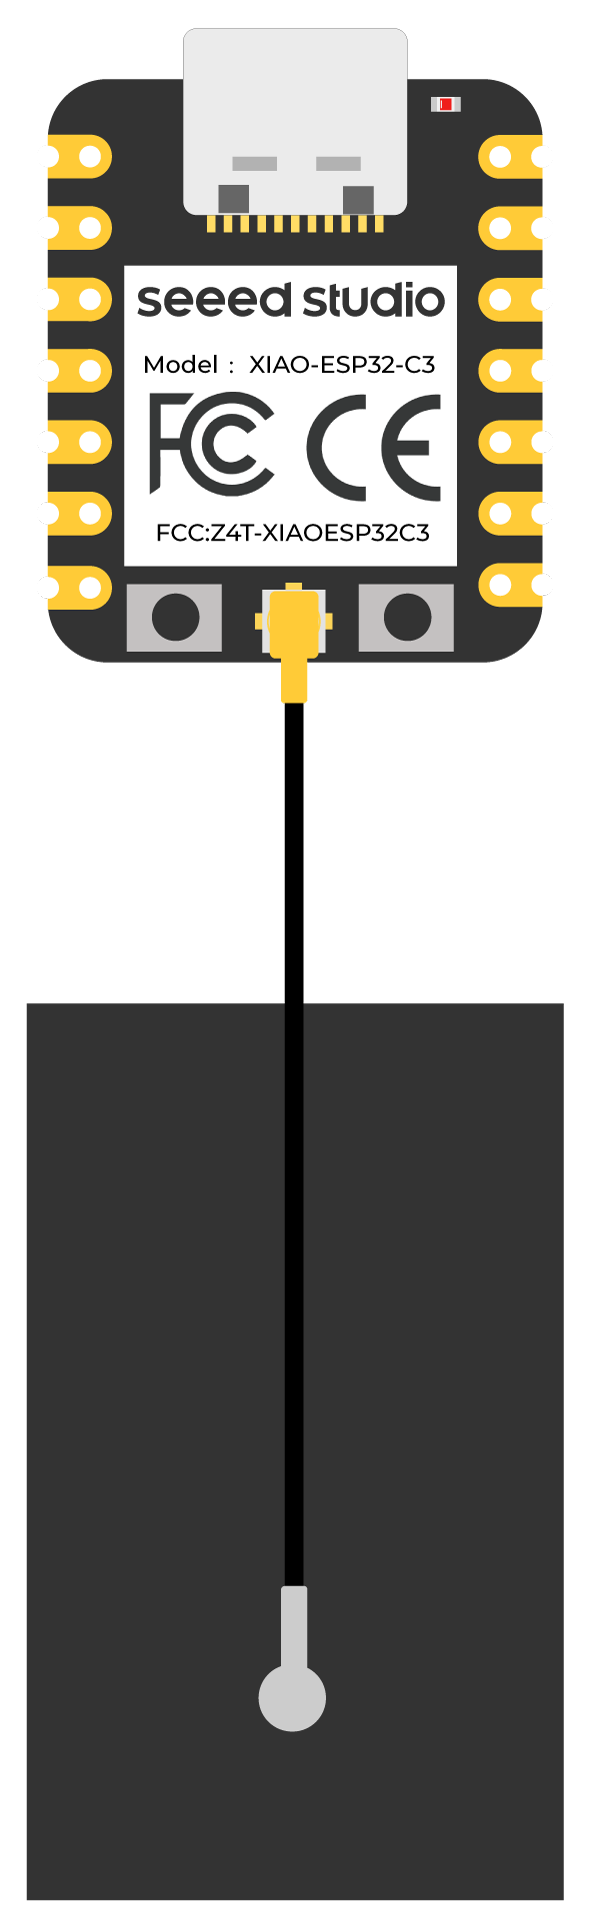
- Step 1. Connect the included WiFi/ Bluetooth antenna to the IPEX connector on the board
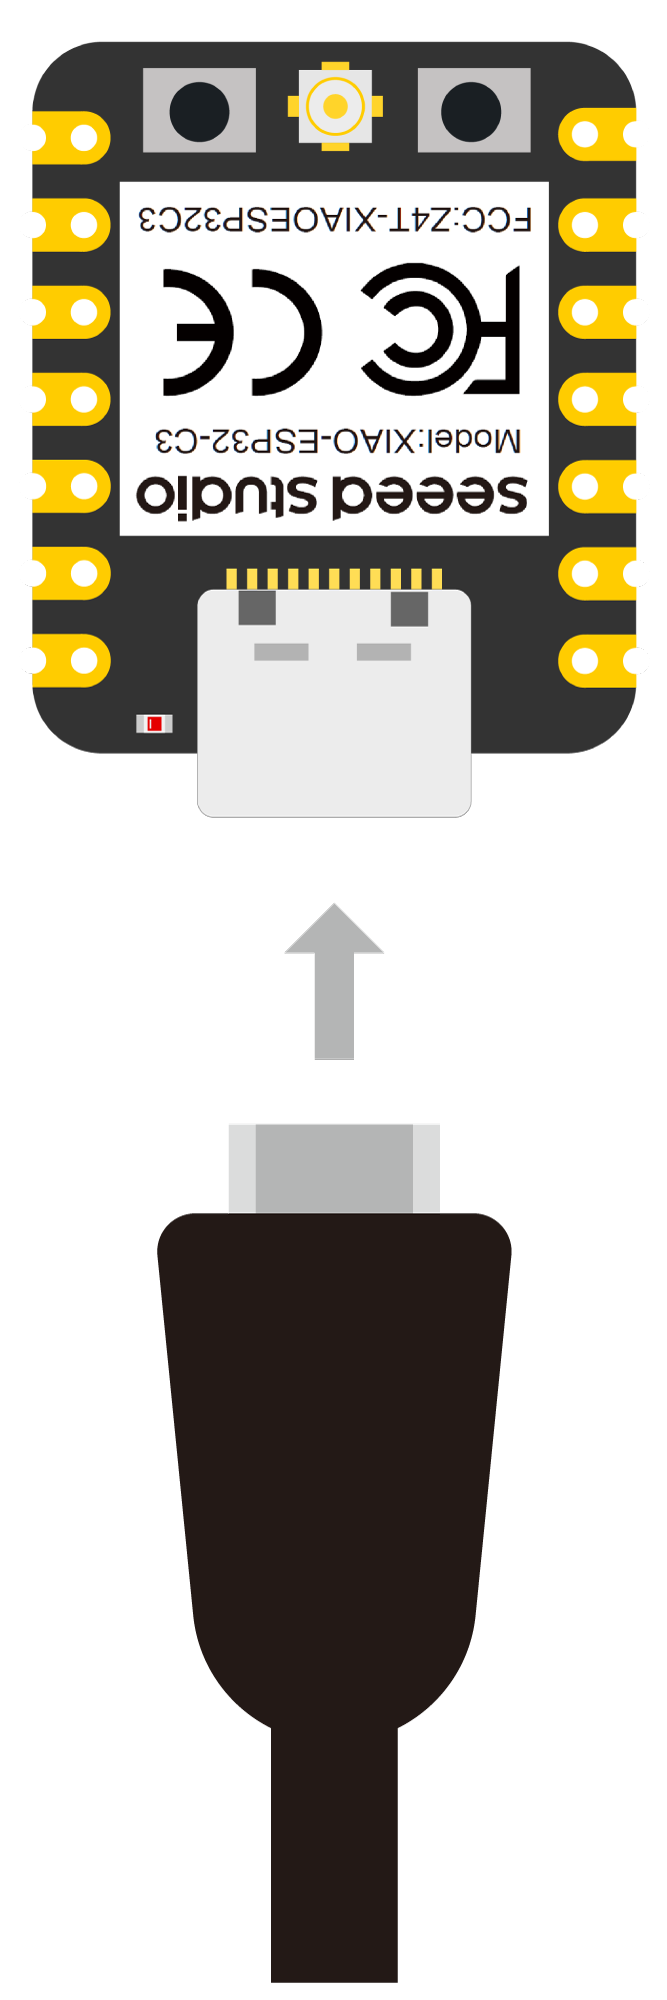
- Step 2. Connect XIAO ESP32C3 to your computer via a USB Type-C cable
Scan Bluetooth devices
In this example, we are going to use XIAO ESP32C3 to scan available Bluetooth devices around it.
- Step 1. Copy and paste the code below into Arduino IDE
#include <BLEDevice.h>
#include <BLEUtils.h>
#include <BLEScan.h>
#include <BLEAdvertisedDevice.h>

int scanTime = 5; //In seconds
BLEScan* pBLEScan;

class MyAdvertisedDeviceCallbacks: public BLEAdvertisedDeviceCallbacks {
    void onResult(BLEAdvertisedDevice advertisedDevice) {
      Serial.printf("Advertised Device: %s \n", advertisedDevice.toString().c_str());
    }
};

void setup() {
  Serial.begin(115200);
  Serial.println("Scanning...");

  BLEDevice::init("");
  pBLEScan = BLEDevice::getScan(); //create new scan
  pBLEScan->setAdvertisedDeviceCallbacks(new MyAdvertisedDeviceCallbacks());
  pBLEScan->setActiveScan(true); //active scan uses more power, but get results faster
  pBLEScan->setInterval(100);
  pBLEScan->setWindow(99);  // less or equal setInterval value
}

void loop() {
  // put your main code here, to run repeatedly:
  BLEScanResults foundDevices = pBLEScan->start(scanTime, false);
  Serial.print("Devices found: ");
  Serial.println(foundDevices.getCount());
  Serial.println("Scan done!");
  pBLEScan->clearResults();   // delete results fromBLEScan buffer to release memory
  delay(2000);
}
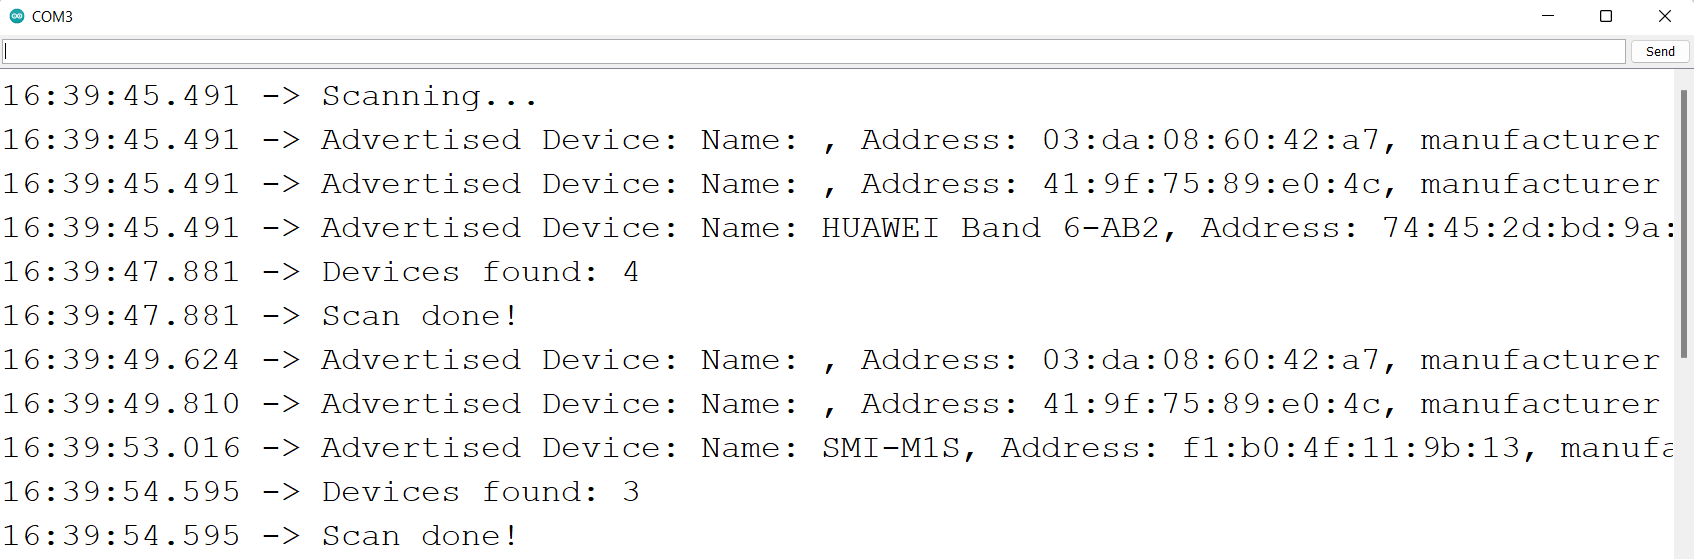
Step 2. Upload the codes and open the Serial Monitor to start scanning for Bluetooth devices
XIAO ESP32C3 as Bluetooth server
In this example, we are going to use XIAO ESP32C3 as a Bluetooth server. Here we will search for XIAO ESP32C3 board using a smartphone and send out strings to display on the serial monitor
- Step 1. Copy and paste the code below into Arduino IDE
#include <BLEDevice.h>
#include <BLEUtils.h>
#include <BLEServer.h>

// See the following for generating UUIDs:
// https://www.uuidgenerator.net/

#define SERVICE_UUID        "4fafc201-1fb5-459e-8fcc-c5c9c331914b"
#define CHARACTERISTIC_UUID "beb5483e-36e1-4688-b7f5-ea07361b26a8"


class MyCallbacks: public BLECharacteristicCallbacks {
    void onWrite(BLECharacteristic *pCharacteristic) {
      std::string value = pCharacteristic->getValue();

      if (value.length() > 0) {
        Serial.println("*********");
        Serial.print("New value: ");
        for (int i = 0; i < value.length(); i++)
          Serial.print(value[i]);

        Serial.println();
        Serial.println("*********");
      }
    }
};

void setup() {
  Serial.begin(115200);

  BLEDevice::init("MyESP32");
  BLEServer *pServer = BLEDevice::createServer();

  BLEService *pService = pServer->createService(SERVICE_UUID);

  BLECharacteristic *pCharacteristic = pService->createCharacteristic(
                                         CHARACTERISTIC_UUID,
                                         BLECharacteristic::PROPERTY_READ |
                                         BLECharacteristic::PROPERTY_WRITE
                                       );

  pCharacteristic->setCallbacks(new MyCallbacks());

  pCharacteristic->setValue("Hello World");
  pService->start();

  BLEAdvertising *pAdvertising = pServer->getAdvertising();
  pAdvertising->start();
}

void loop() {
  // put your main code here, to run repeatedly:
  delay(2000);
}
Step 2. Upload the codes and open the Serial Monitor
Step 3. Download and install LightBlue App on your smartphone
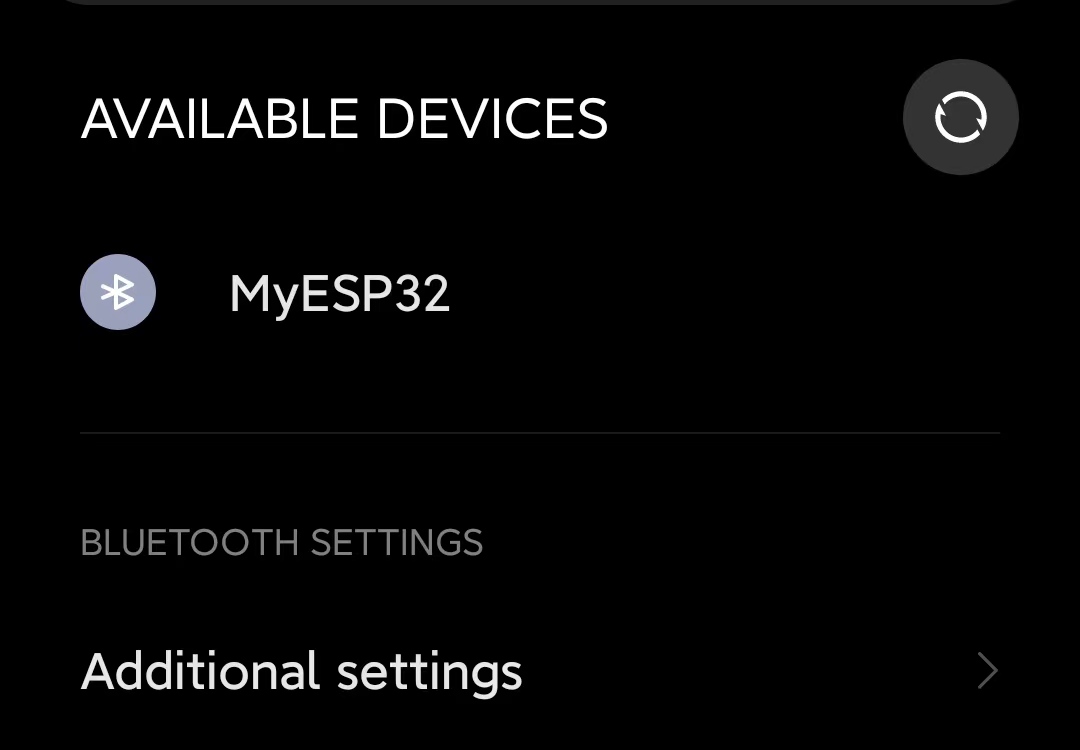
- Step 4. Open Bluetooth on your phone, bring the phone close to XIAO ESP32C3, scan for devices and connect with MyESP32 device
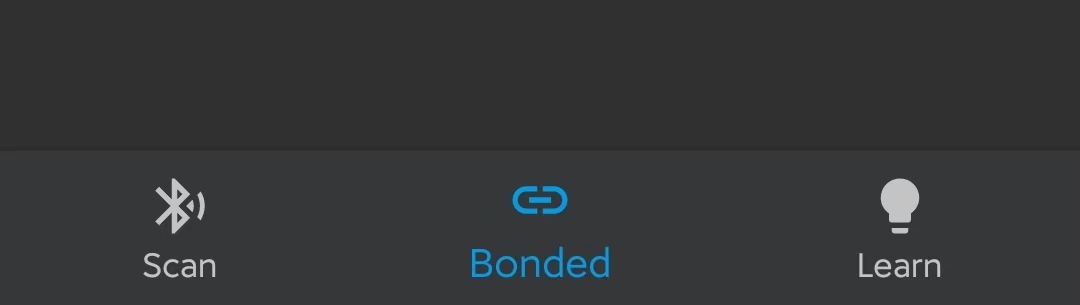
- Step 5. Open the LightBlue app and click Bonded tab
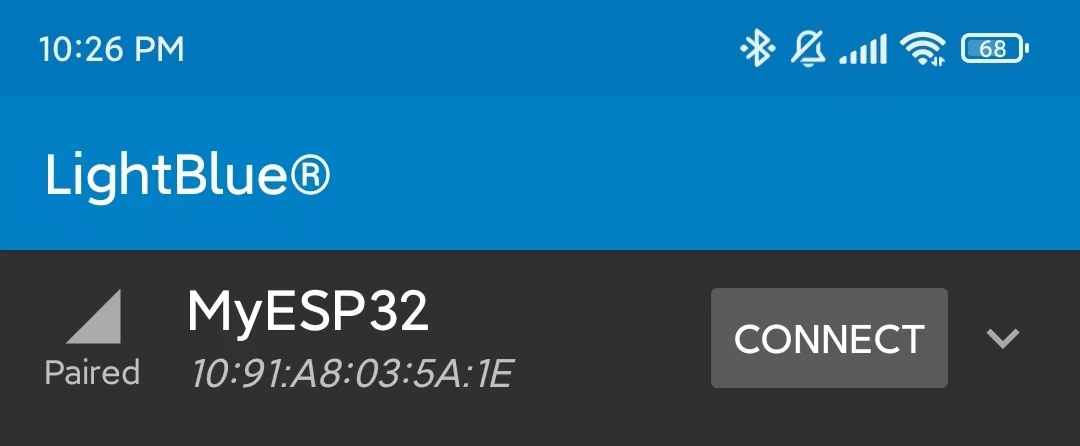
- Step 6. Click CONNECT next to MyESP32
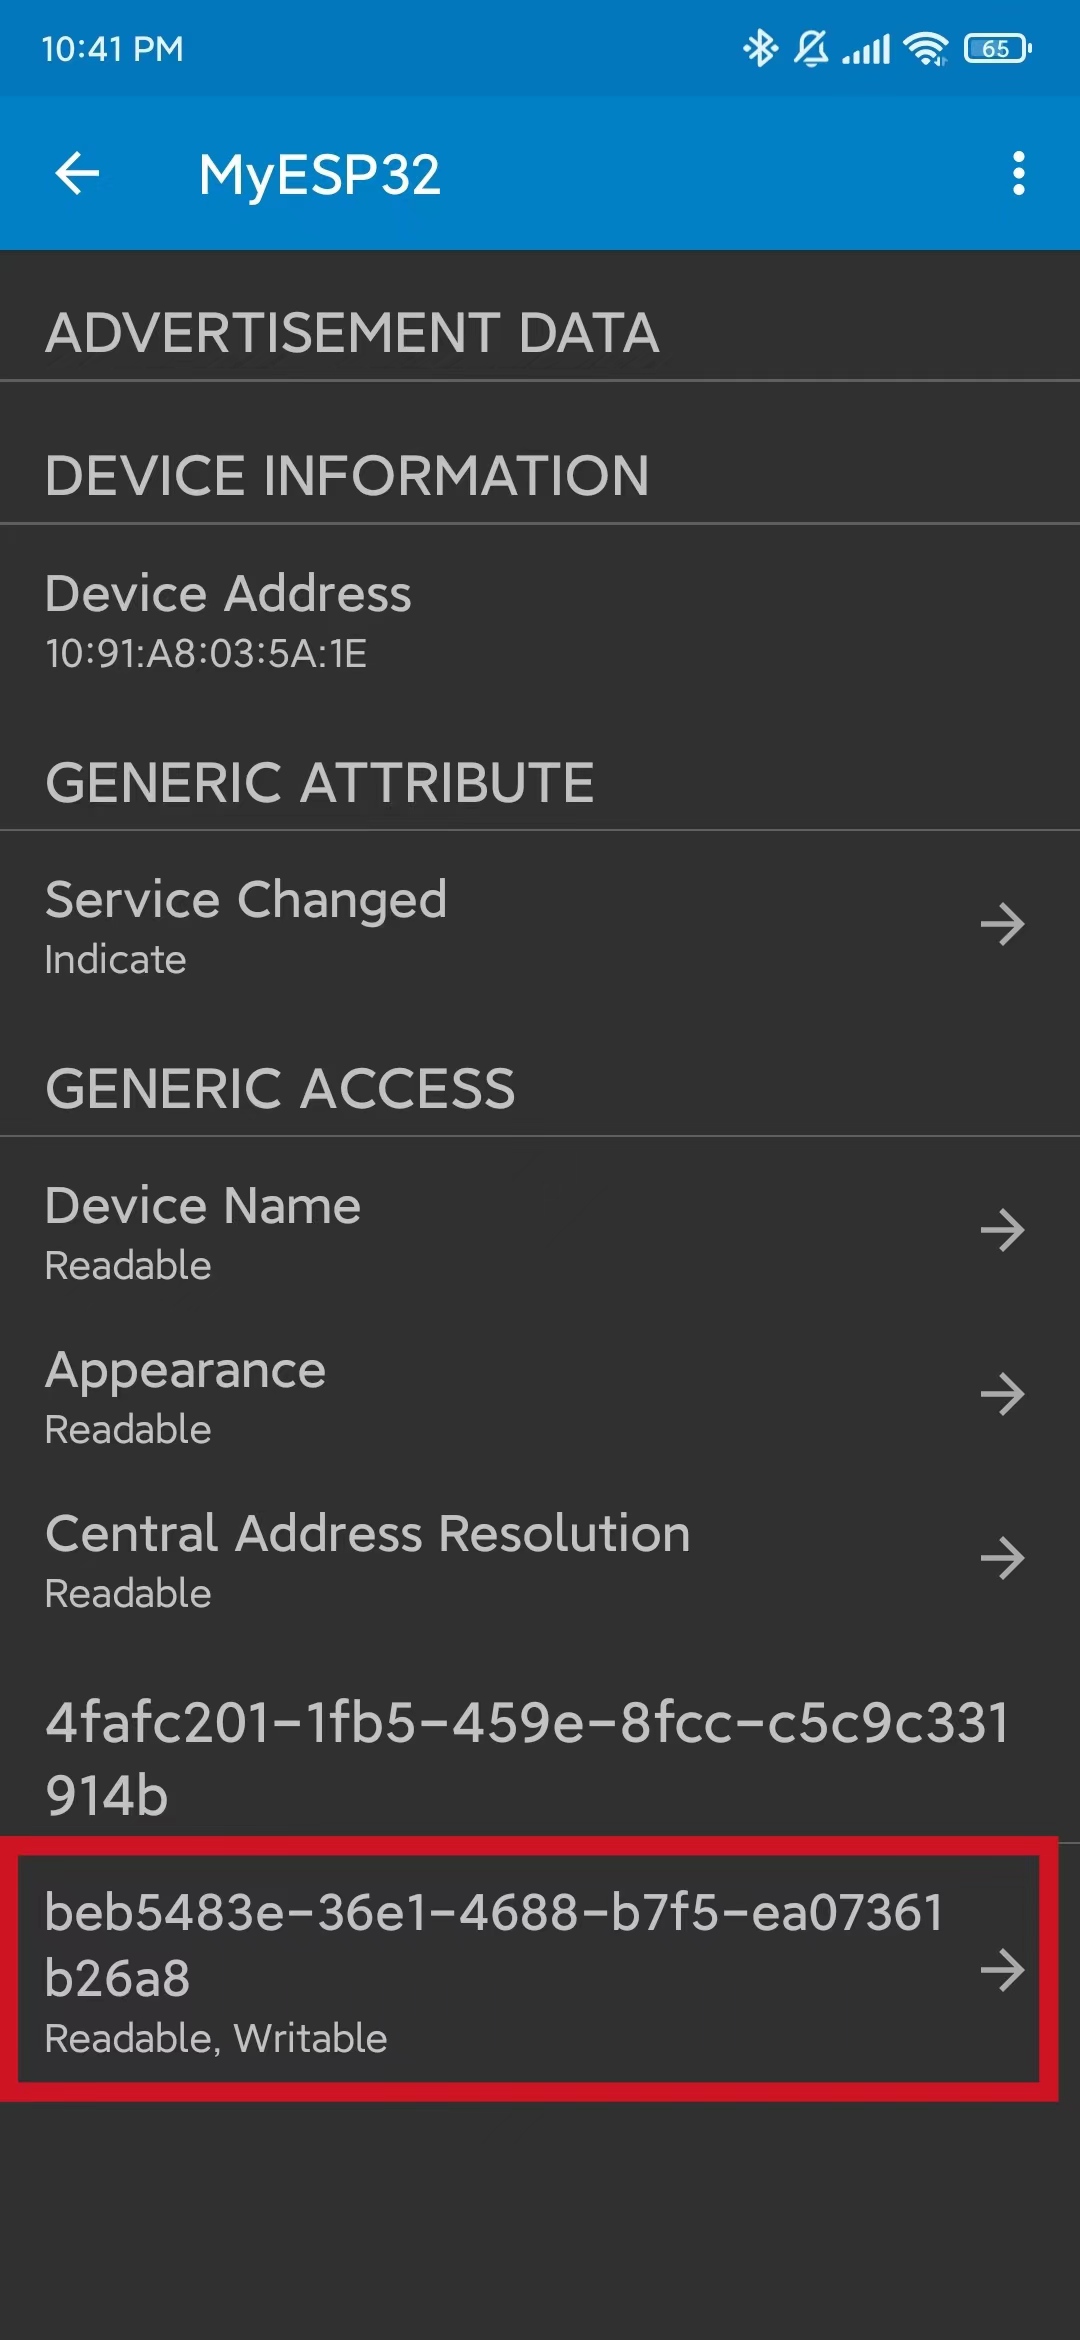
- Step 7. Click the section at the very bottom which says Readable, Writable
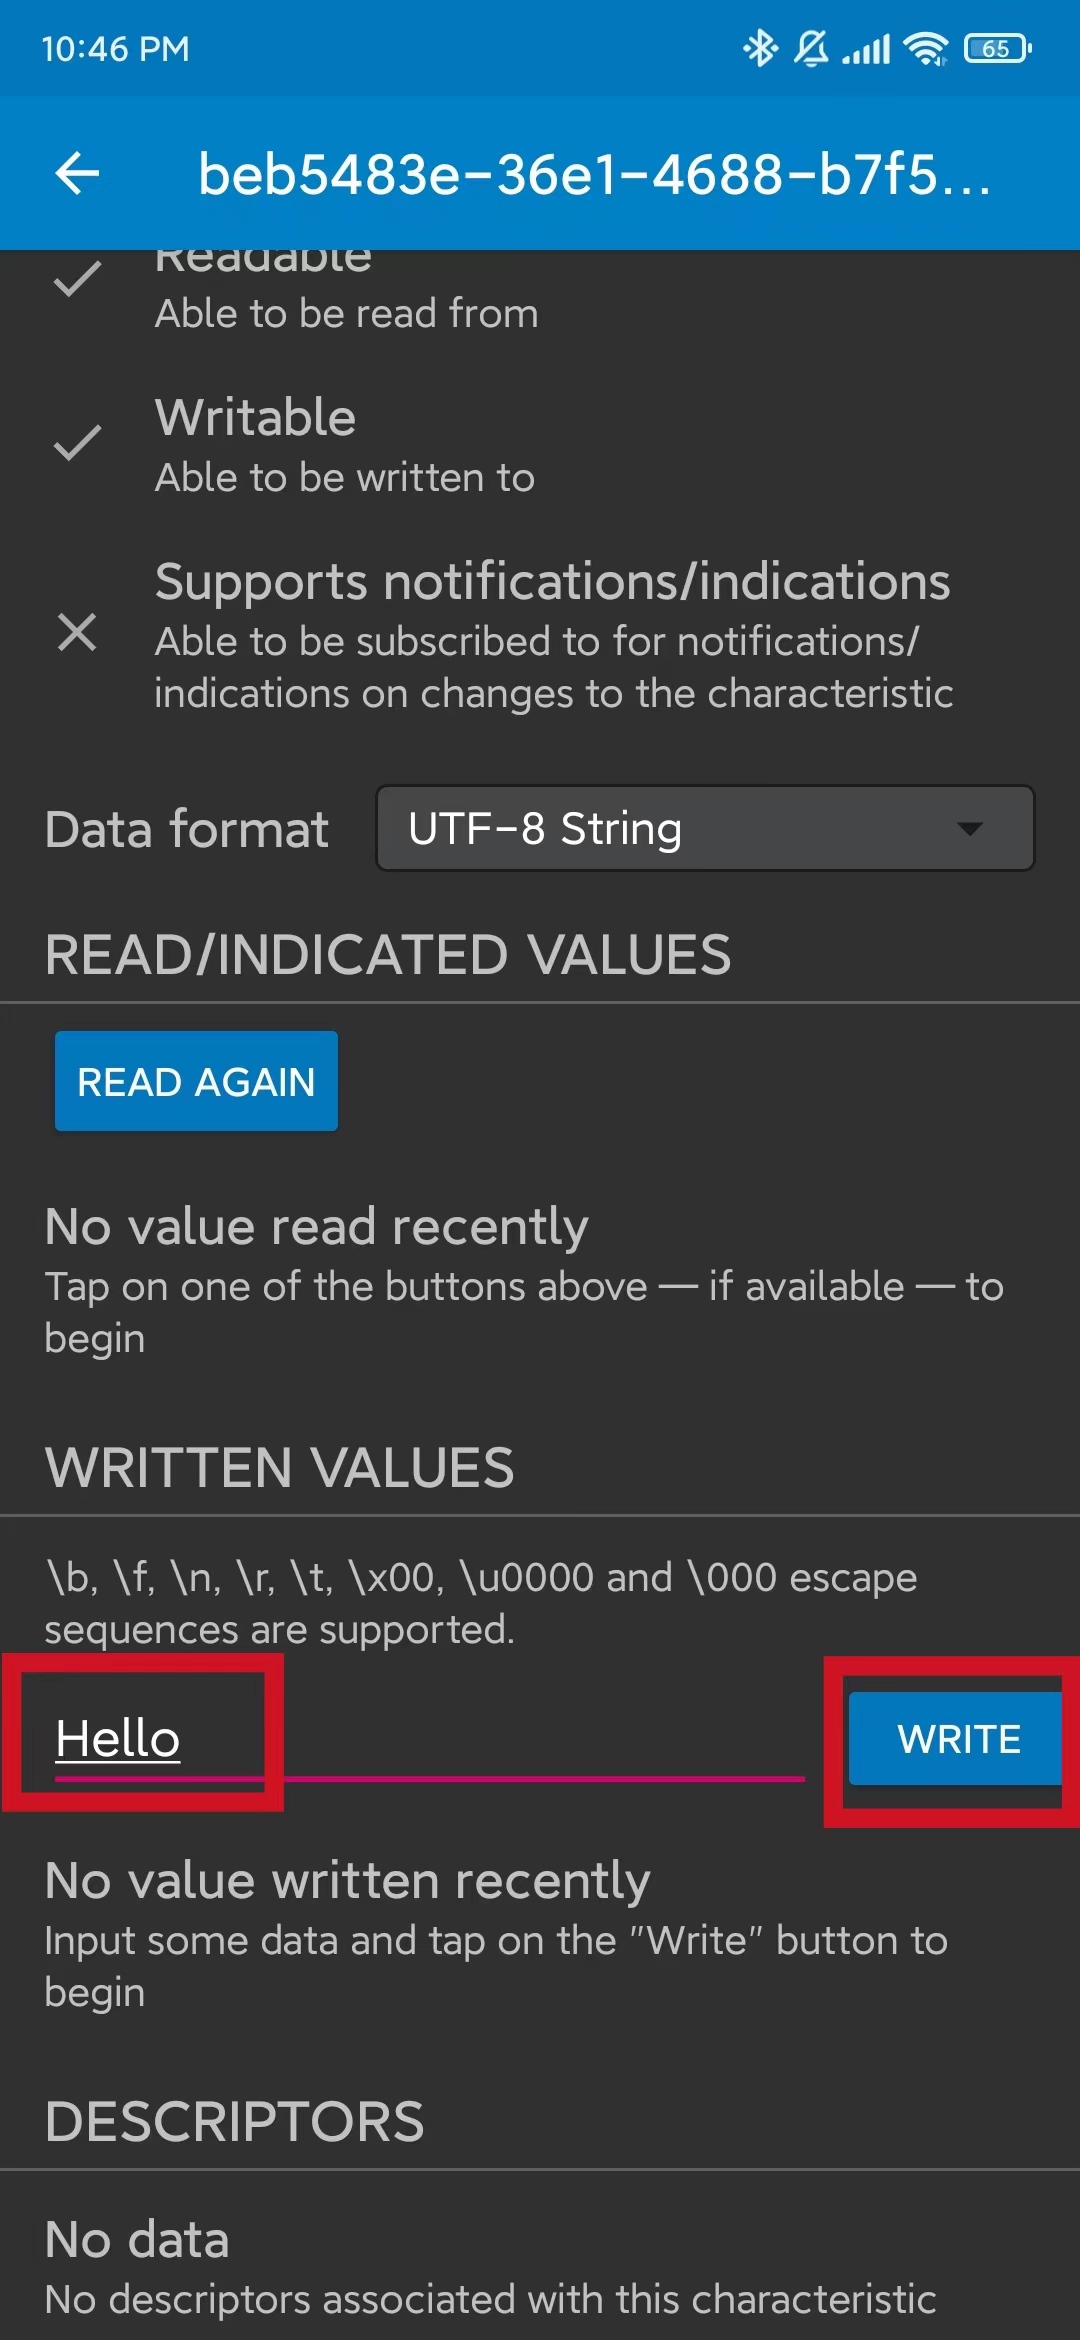
- Step 8. Under Data format drop-down menu, select UTF-8 String
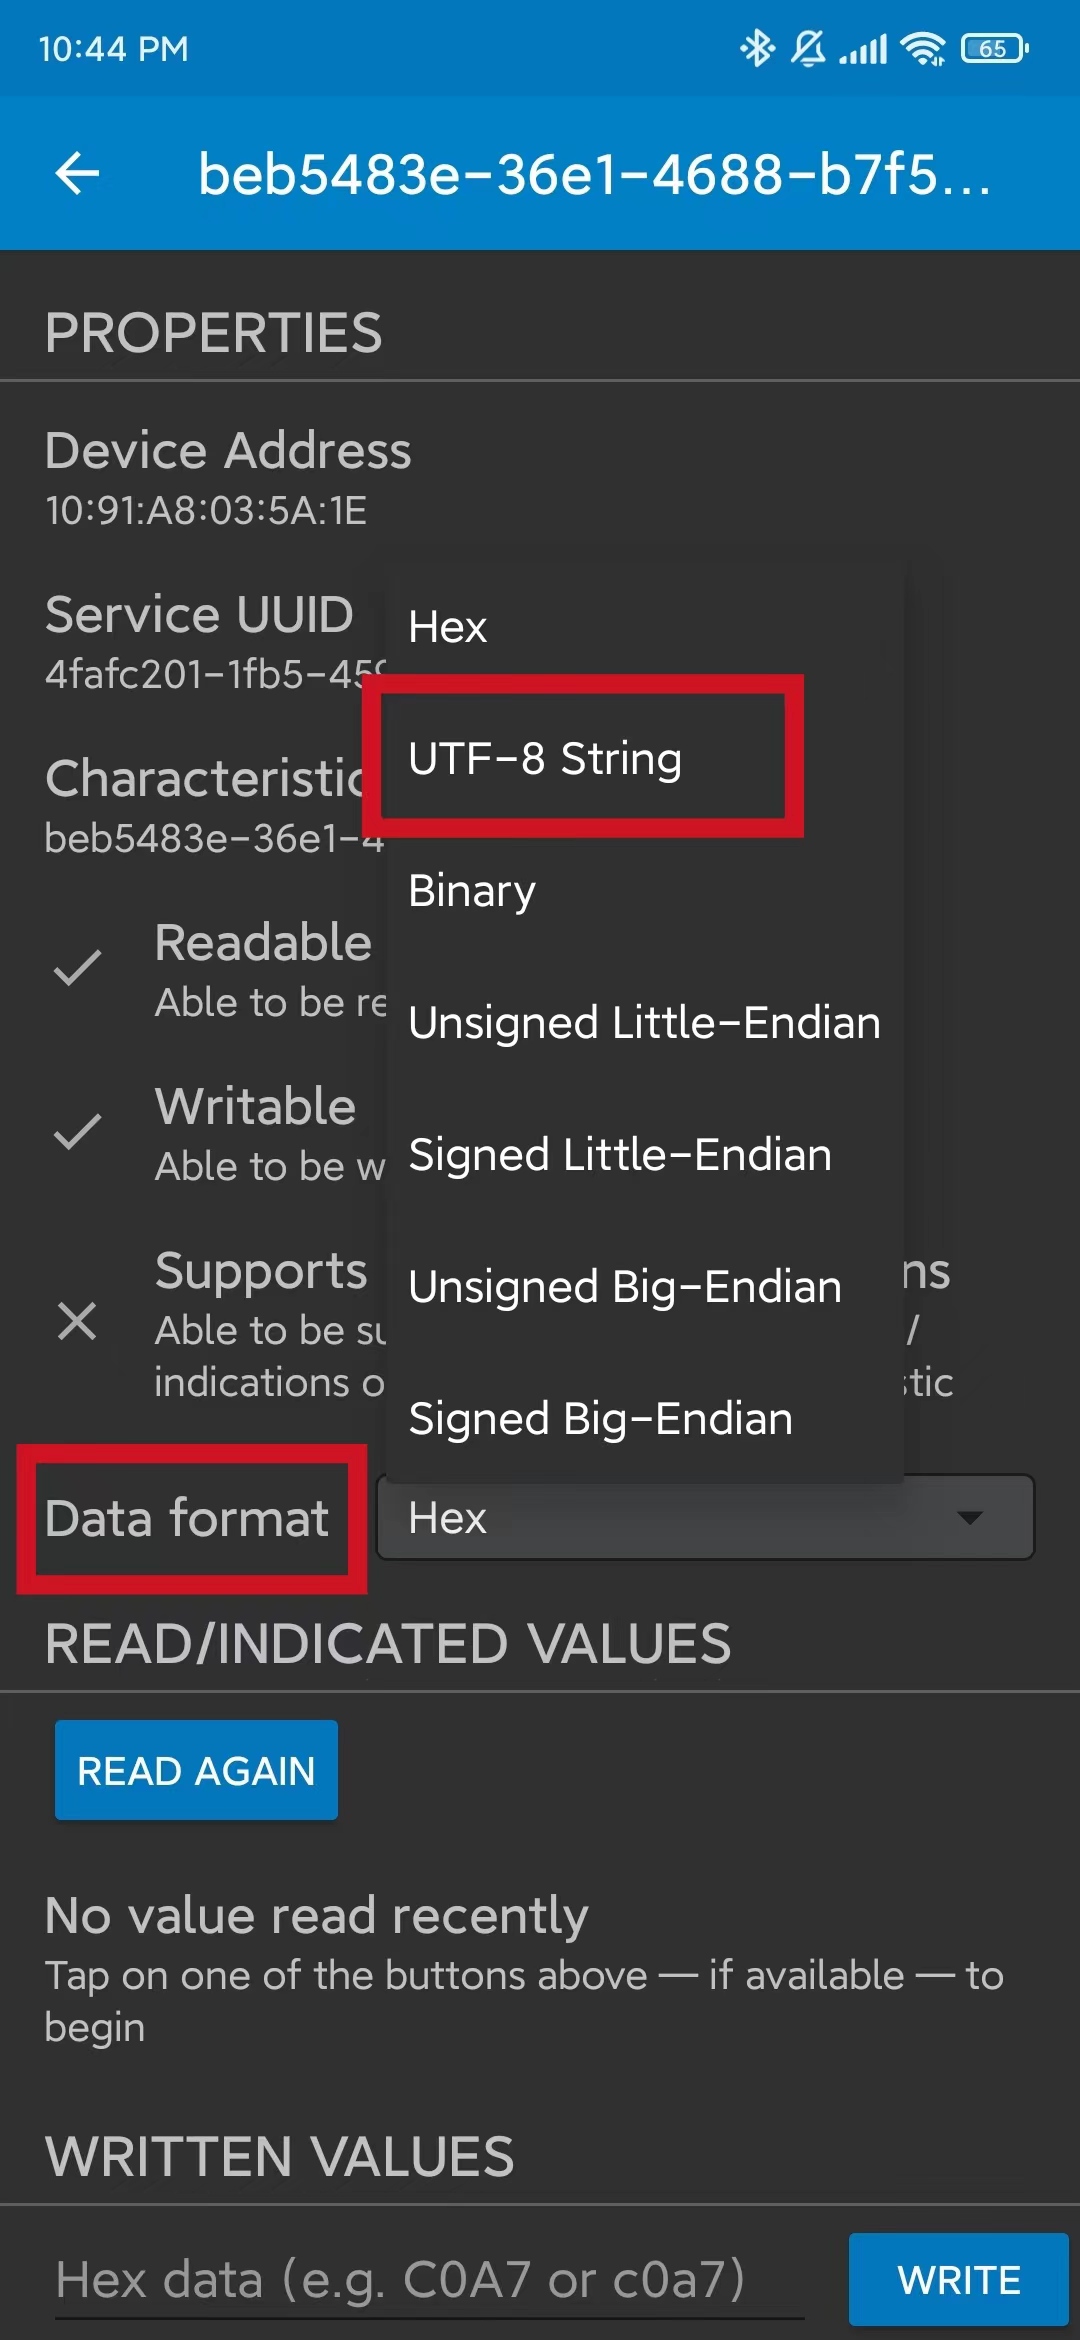
- Step 9. Type "Hello" under WRITTEN VALUES and click WRITE
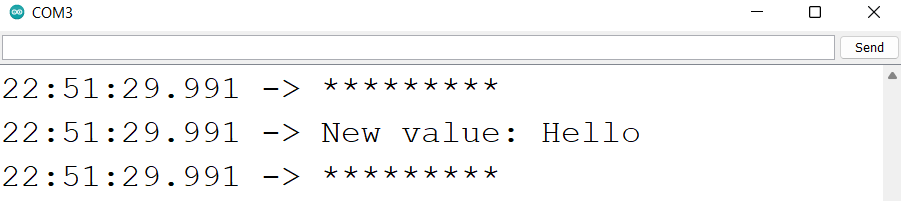
You will see the text string "Hello" output on the serial monitor of Arduino IDE
Tech support
Please do not hesitate to submit the issue into our forum.
