Grove - Circular LED
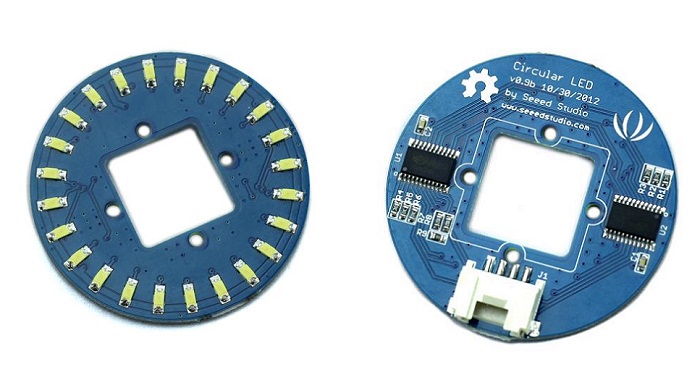
This is a unique ring– it has a florid body with 24 controllable LEDs. Maybe it will drive the inspiration out of you to make a glowing magic ring! There is a 1*1 square hollow-out in the middle of this module, where you can place a Grove Encoder in and make it a rotary visual encoder!

Features
- Circular shape
- 24 LEDs, about 5.5 mA drive current for each channel.
- Controllable LEDs with florid effects
- Grove Interface.
Schematic

Specification
| Item | Min | Typical | Max | Unit |
|---|---|---|---|---|
| Voltage | 4.5 | 5 | 5.5 | VDC |
| Current | / | 5.5 for each LED | mA | |
| Dimension | Ring Form:4.5 diameter | cm | ||
| Net Weight | 12 | g | ||
Interface

Getting Started
Materials required
| Seeeduino V4.2 | Base Shield | Grove - Circular LED |
|---|---|---|
|
|
|
| Get ONE Now | Get ONE Now | Get ONE Now |
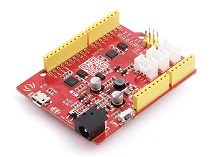
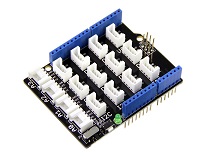

In addition, you can consider our new Seeeduino Lotus M0+, which is equivalent to the combination of Seeeduino V4.2 and Baseshield.
**1** Please plug the USB cable gently, otherwise you may damage the port. Please use the USB cable with 4 wires inside, the 2 wires cable can't transfer data. If you are not sure about the wire you have, you can click [here](https://www.seeedstudio.com/Micro-USB-Cable-48cm-p-1475.html) to buy

**2** Each Grove module comes with a Grove cable when you buy. In case you lose the Grove cable, you can click [here](https://www.seeedstudio.com/Grove-Universal-4-Pin-Buckled-20cm-Cable-%285-PCs-pack%29-p-936.html) to buy.
Hardware Connection
Step 1. Connect the Grove - Circular LED with the D6 port of the Base Shield.
Step 2. Plug Grove - Base Shield into Seeeduino.
Step 3. Connect Seeeduino to PC via a USB cable.
If we don't have Grove Base Shield, We also can directly connect Grove - Circular LED to Seeeduino as below.
| Seeeduino | Grove - Circular LED |
|---|---|
| 5V | Red |
| GND | Black |
| D7 | White |
| D6 | Yellow |
Software
If this is the first time you work with Arduino, we strongly recommend you to see [Getting Started with Arduino](https://wiki.seeedstudio.com/Getting_Started_with_Arduino/) before the start.
- Step 1. Download the Grove - LED Bar Library from Github.
- Step 2. Refer How to install library to install library for Arduino.
- Step 3. Open Arduino IDE -> File -> Examples -> Grove_LED_Bar -> BasicControl
- Step 4. Uncomment the define MY9221_LED_NUM 24 and comment #define MY9221_LED_NUM 10 as below.
//#define MY9221_LED_NUM 10
#define MY9221_LED_NUM 24
- Step 5. Upload the example to Arduino. If you do not know how to upload the code, please check how to upload code.
- Step 6. You can see the led is running from .C, 23 and AB repeatly.
Play with Codecraft
Hardware
Step 1. Connect a Grove - Circular LED to port D5 of a Base Shield.
Step 2. Plug the Base Shield to your Seeeduino/Arduino.
Step 3. Link Seeeduino/Arduino to your PC via an USB cable.
Software
Step 1. Open Codecraft, add Arduino support, and drag a main procedure to working area.
If this is your first time using Codecraft, see also [Guide for Codecraft using Arduino](https://wiki.seeedstudio.com/Guide_for_Codecraft_using_Arduino/).
Step 2. Drag blocks as picture below or open the cdc file which can be downloaded at the end of this page.

Upload the program to your Arduino/Seeeduino.
When the code finishes uploaded, you will see the LED run in the circular.
Schematic Online Viewer
Source
Tech Support
Please do not hesitate to submit the issue into our forum.