Arduino Tutorials - How to Use Static (Pre-compiled) Libraries in Arduino
To improve compile time of big projects in Arduino, you can use one of the newer features introduced in Arduino IDE (>=1.8.6), static (pre-compiled) libraries for your Arduino Sketches.

Why use pre-compiled libraries?
The pre-compiled library allows to share the functions of the library without exposing the source code.
The only limitation of pre-compiled libraries is that they are only valid for boards or MCUs that have been compiled for.
Getting Started
Let's take an Arduino library as example and convert it to pre-compiled library. Here I will use Seeed_Arduino_LIS3DHTR as Arduino library and Wio Terminal as board option.
STEP1. Arduino Library Configurations
Navigate to the library root path and open the library.properties file and add the following and save the file.
dot_a_linkage=true

STEP.2 Arduino IDE Set-up
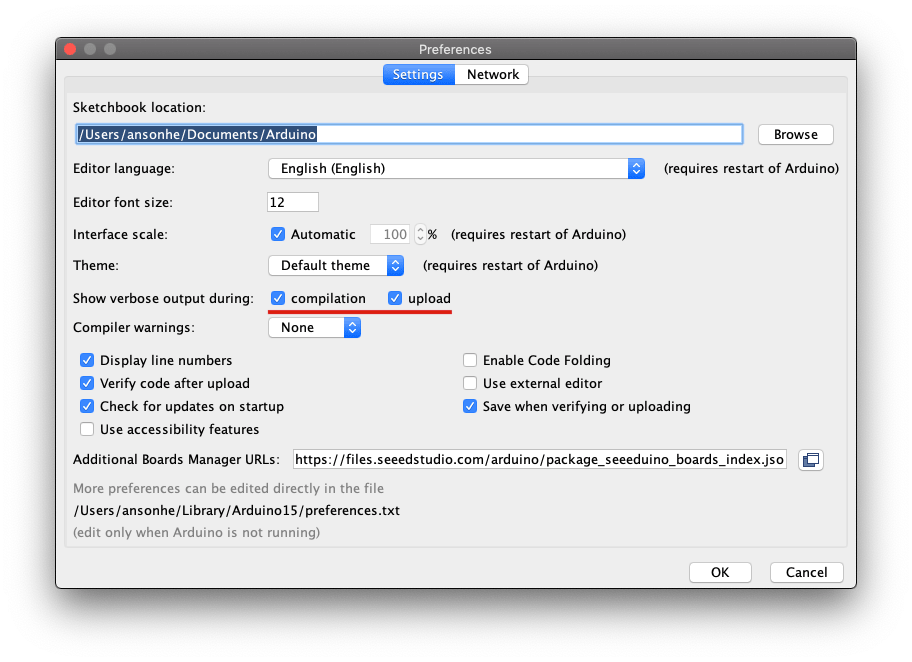
Open Arduino IDE, and navigate to Settings. Make sure that the "Show verbose output during: compilation and upload" are ticked.

STEP.3 Obtaining Temporaty Build Location and Board Framework Flag
Select Wio Terminal as Board. Compile any sketch that has an #include directive for your library. This could just be a bare minimum sketch. In my case, it's #include<LIS3DHTR.h>.
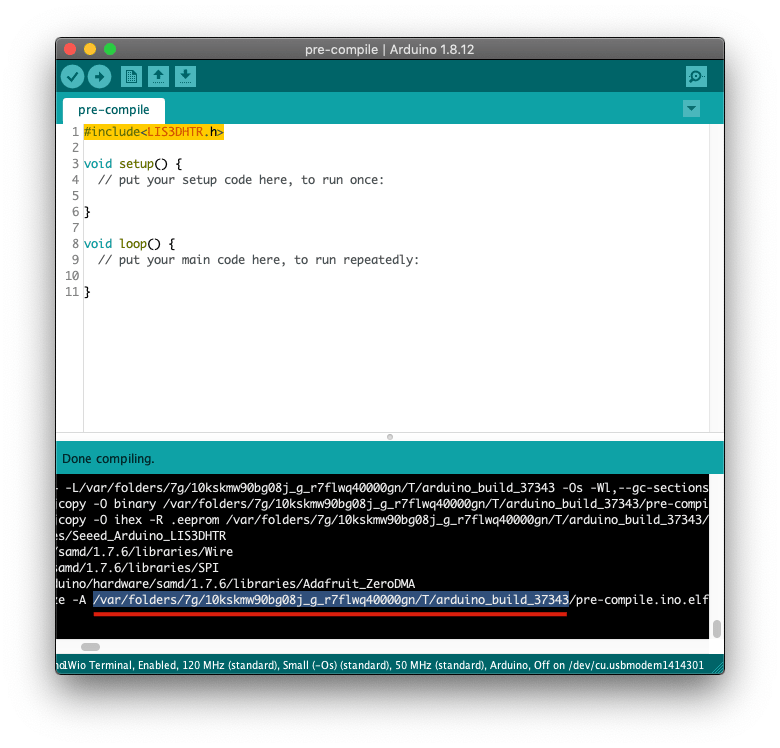
After it's compilation, check the compile log windows and find the location of temporary build folder. This should be printed out in the final command of the output. For example, in my case the command is:
/Users/ansonhe/Library/Arduino15/packages/Seeeduino/tools/arm-none-eabi-gcc/7-2017q4/bin/arm-none-eabi-size -A /var/folders/7g/10kskmw90bg08j_g_r7flwq40000gn/T/arduino_build_37343/pre-compile.ino.elf
And so the temporary build path is:
/var/folders/7g/10kskmw90bg08j_g_r7flwq40000gn/T/arduino_build_37343

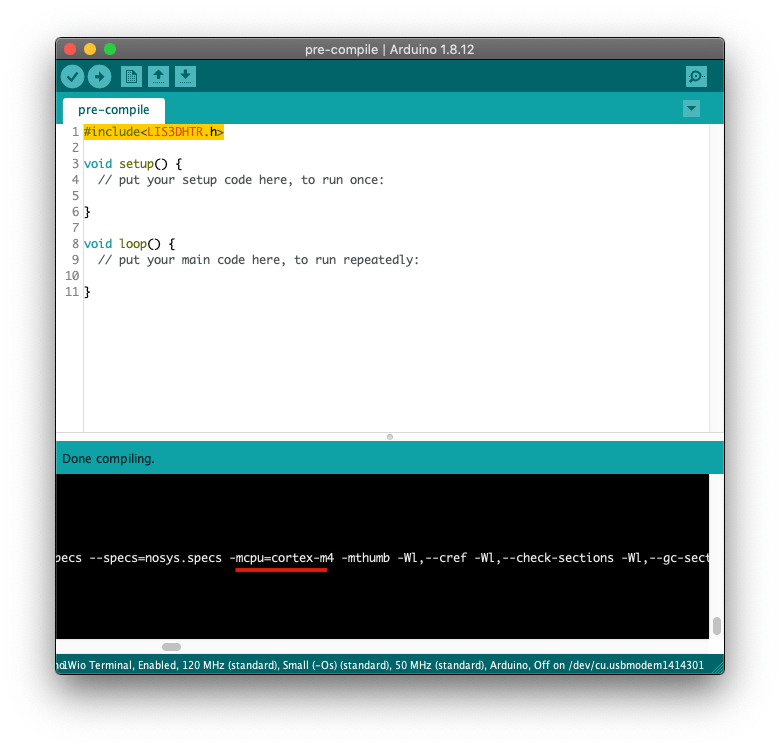
Copy this path and will be used later. Also one more thing to be noted is that to find the -mcpu= flag to get the board framework flag compiled for the selected board. In my case, Wio Terminal is labelled as:
-mcpu=cortex-m4

STEP.4 Copy the .a file to the Library Folder
Navigate to the temporary build path folder, and navigate to libraries -> Seeed_Arduino_LIS3DHTR and you should see a Seeed_Arduino_LIS3DHTR.a file.

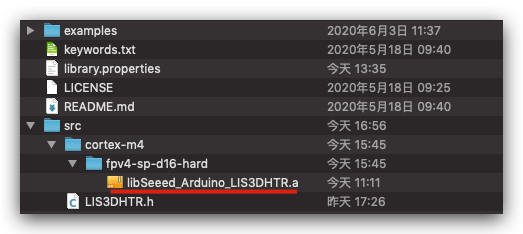
Copy the Seeed_Arduino_LIS3DHTR.a file from the {temporary build folder}/libraries/{library name} folder to the Arduino/libraries/{library name}/src/{Board Framework Flag} sub-folder of your library folder. In my case, it is placed under src/cortex-m4.
Rename the .a file, appending "lib" to the start of the name. In my case, it becomes libSeeed_Arduino_LIS3DHTR.a.

STEP.5 Adding Pre-Compiled Flag
Now, we can navigate back to the library.properties and remove dot_a_linkage=true and add the following flags:
precompiled=true
ldflags=-lSeeed_Arduino_LIS3DHTR
where the ldflags is -l+{library name}.
Note that you don't specify the "lib" part of the filename in the flag.

Now, you can remove the .cpp files from the src of the library folders and Arduino IDE will use the pre-compiled library!
Having Troubles?
For some reasons, some boards may require the .a file further inside the src file. For example, Wio Terminal is the case. If you having the same problem, please follow through.
Going through the compile log information, you will see that a path that the IDE is looking:

/Users/ansonhe/Documents/Arduino/libraries/Seeed_Arduino_LIS3DHTR/src/cortex-m4/fpv4-sp-d16-hard" does not exist
So only need to put the libSeeed_Arduino_LIS3DHTR.a file inside the fpv4-sp-d16-hard under cortex-m4.

Now, the Arduino will pick up the pre-compiled library path!
Here will also provide an example that uses static library here. Please also use this as reference.
Resources
FAQ
- One thing to be noted is that, this pre-compiled library feature only supports Arduino IDE >=
1.8.6, so please update to the latest version of Arduino IDE to avoid this error.
Tech Support
Please submit any technical issue into our forum.
