Grove - OLED Display 0.66" (SSD1306)
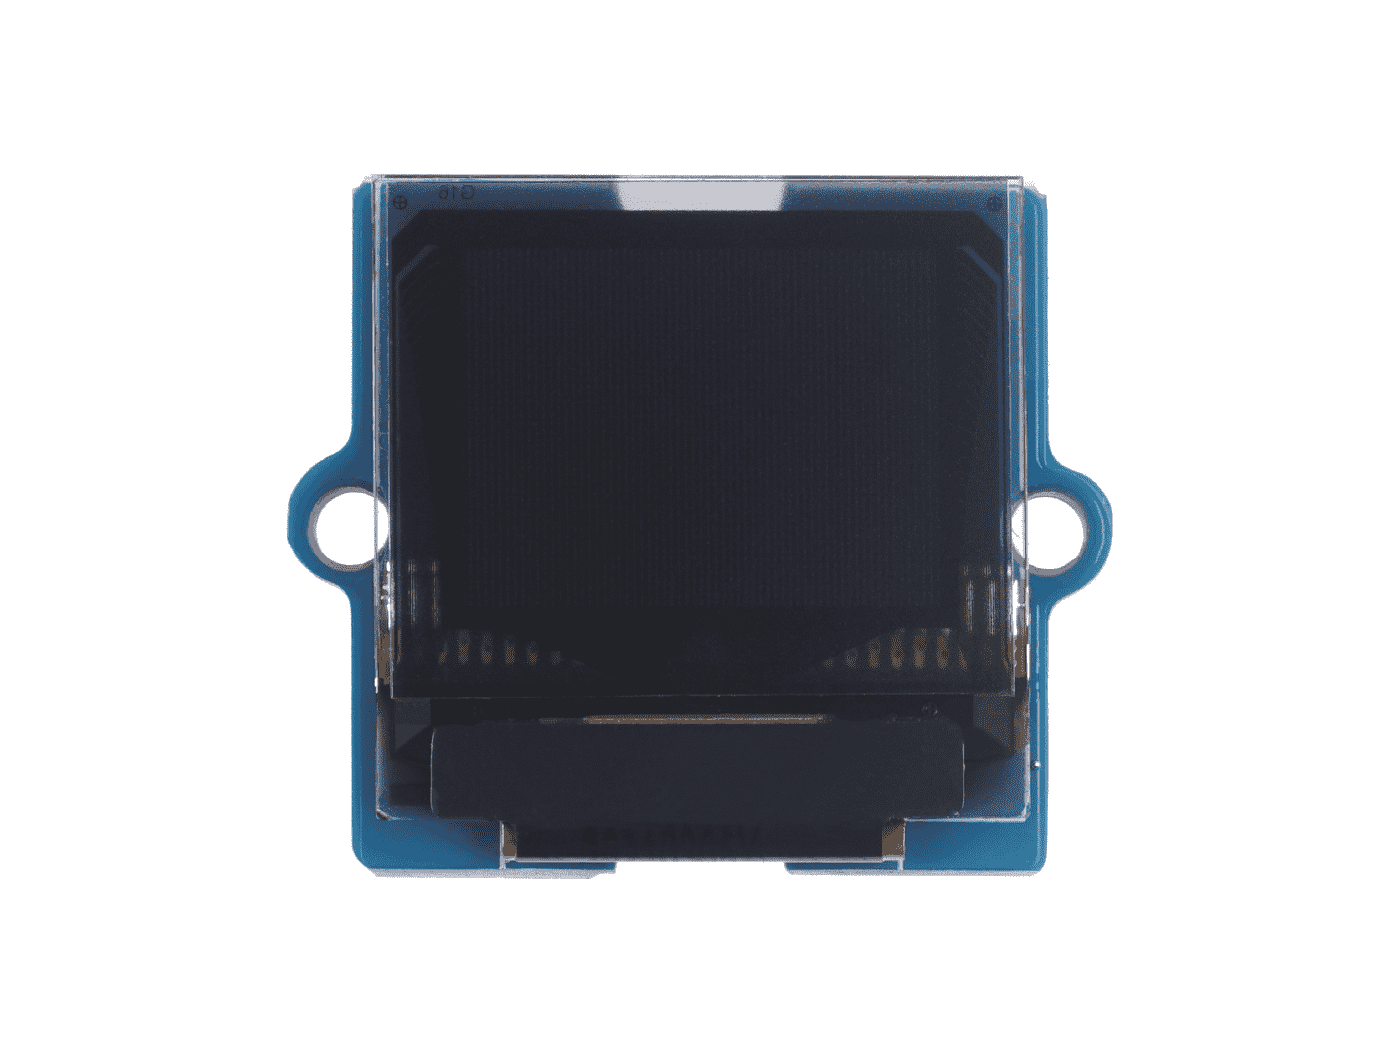
As a new version, the Grove - OLED Display 0.66" (SSD1306) has a smaller screen compared to the other OLED display like Grove - OLED Display 0.96" (SSD1315). And yet it can still display with 64×48 resolution and it preserve the performance like the others, e.g. high brightness, low power consumption and Grove interface on the back, etc.
You can use I2C interface to light up the mini display with your microcontroller to display words, images or whatever you want. 0.66" display screen helps you to show the information in a smaller place and you can use it as Arduino OLED display, Raspberry Pi PLED display, etc.
This Grove-OLED Display supports the U8g2 monochrome displays library written by Olikraus. The library is so convenient and well compatible that it can support SSD1306 and other chips like SSD1315. So get you one now and have fun with this tiny screen!

Feature
- Based on SSD1306, cropped to 64×48 resolution(Monochrome)
- Ultra-small size: 20 * 20mm
- Changeable I2C address
- 3.3V/5V power supply compatible
- High contrast, high brightness
- Low power consumption
- Wide operating temperature range: -40℃ ~ +85 ℃
- User-friendly design: Grove interface on the back
Specification
| Parameter | Value |
|---|---|
| Input voltage | 3.3V / 5V |
| Output Voltage | 0 ~ 2.3V |
| Pixels | 64 x 48 |
| Temperature Range | -40℃ ~ +85 ℃ |
| Interface | I2C |
Hardware Overview
Platforms Supported
| Arduino | Raspberry Pi |
|---|---|
|
|
Getting Started
Play With Arduino
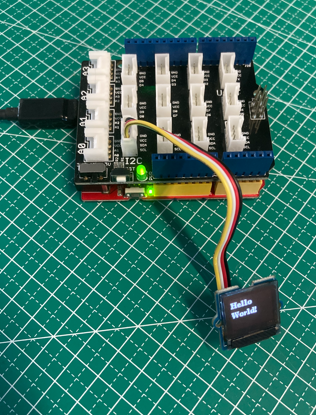
Materials required
| Seeeduino V4.2 | Base Shield | Grove - OLED Display 0.66" |
|---|---|---|
|
|
|
| Get ONE Now | Get ONE Now | Get ONE Now |


.png)
In addition, you can consider our new Seeeduino Lotus M0+, which is equivalent to the combination of Seeeduino V4.2 and Baseshield.
Hardware Connection
Step 1. Plug Grove - TDS Sensor to I2C port of Grove - Base Shield.
Step 2. Plug Grove - Base Shield into Seeeduino.

Software
If this is the first time you work with Arduino, we strongly recommend you to see [Getting Started with Arduino](https://wiki.seeedstudio.com/Getting_Started_with_Arduino/) before the start.
Step 1. Navigate to Sketch -> Include Library -> Manage Libraries... and Search and Install
U8g2library in the Library Manager.Step 2. Open the Arduino IDE and create a new file, then copy the following code into the new file.
#include <Arduino.h>
#include <U8g2lib.h>
#include <Wire.h>

U8G2_SSD1306_128X64_NONAME_F_SW_I2C u8g2(U8G2_R0, /* clock=*/ SCL, /* data=*/ SDA, /* reset=*/ U8X8_PIN_NONE);   // All Boards without Reset of the Display

void setup(void) {
  u8g2.begin();
}

void loop(void) {
  u8g2.clearBuffer();
  u8g2.setFont(u8g2_font_ncenB08_tr);
  u8g2.drawStr(32,30,"Hello \n");
  u8g2.drawStr(32,45,"World!");
  u8g2.sendBuffer();
  delay(1000);
}
Note: You should know the Grove - OLED Display 0.66" (SSD1306) screen is based on the 128×64 resolution screen. When you want to display by U8g2 SSD 128*64 drive , you may need to start the point at (31,16) instead of (0,0). The range is from (31,16) to (95,63).

Step 3. Upload the demo. If you do not know how to upload the code, please check How to upload code.
Step 4. The OLED Display should look like this:
U8g2 Library Introduction
U8g2 is a monochrome graphics library for embedded devices. U8g2 supports monochrome OLEDs and LCDs, which include our chip SSD1306.
The Arduino library U8g2 can be installed from the library manager of the Arduino IDE. U8g2 also includes U8x8 library:
U8g2
- Includes all graphics procedures (line/box/circle draw).
- Supports many fonts. (Almost) no restriction on the font height.
- Requires some memory in the microcontroller to render the display.
U8x8
- Text output only (character) device.
- Only fonts allowed with fit into a 8x8 pixel grid.
- Writes directly to the display. No buffer in the microcontroller required.
Here provides the U8g2 Library wiki as well as the U8g2 API Reference page.
FAQ
Q1# Example not working with other boards?
A1: The U8g2 has different modes while initialising, instead of hardware I2C, it could also use software I2C. If not working, please try to use Software I2C. For more information please visit u8g2. Some examples and brief introductions are also provided here.
Schematic Online Viewer
Resources
Tech Support
Please do not hesitate to submit the issue into our forum.
